
Reader summary
Four points to keep
- Check identity and variant before judging construction details.
- Inspect load-bearing joins and shape-defining seams before cosmetic thread ends.
- Use paired views and clear locations so perspective is not mistaken for asymmetry.
- Classify visible evidence as pass, focused question or material mismatch before parcel submission.
Confirm identity before zooming into a seam
Begin with the saved order record: source link, selected color, size, quantity, model or option code and any construction detail that affected the purchase. A careful stitch review is wasted if the warehouse item is the wrong variant. Confirm the front, back and relevant labels before inspecting close-ups. If the listing grouped several versions, compare the arrival with the exact dated option rather than the hero photograph.
Decide what the item needs to do. A hoodie pocket join, backpack strap anchor, zipper end, trouser crotch seam and decorative sleeve line carry different risks. Write down the two or three joins that affect use or shape. That small priority list prevents a bright thread end from distracting you from a missing reinforcement or visibly open seam.
Separate functional seams from cosmetic finishing
Functional stitching joins panels, secures hardware or controls the shape under wear. Cosmetic finishing includes trimmed thread ends, decorative topstitching, print borders and the neatness of visible edges. Both can matter, but they deserve different weight. A long open gap at a strap anchor is a different category from one untrimmed thread on an interior label.
Use a three-level note. Level one is identity: correct piece and option. Level two is structure: no visibly open join, detached component or shape-changing mismatch at the critical area. Level three is finish: acceptable alignment, cleanup and appearance for your own standard. Do not let a level-three concern erase an unresolved level-one or level-two problem.
- Identity: correct product, variant, size and pieces
- Structure: joins, anchors, closures and shape-defining seams
- Finish: thread ends, edge cleanup, topstitching and visible borders
Read the whole seam before judging one stitch
Follow a seam from one endpoint to the other in the available views. Look for a continuous join, obvious gaps, skipped sections, sudden direction changes, puckering that distorts the panel and thread breaks that appear to release the edge. One macro crop can exaggerate texture while hiding whether the surrounding seam remains secure.
Lighting and compression can make dark thread disappear or create false jagged edges. Compare the same location in a wider image and, where possible, a second angle. Describe what is visible—“a gap appears between the binding and body near the lower right corner”—rather than declaring hidden construction failure. Warehouse photos do not reveal seam allowance, stitch density throughout the interior or how the join behaves under repeated load.
Prioritize load-bearing and high-movement joins
On clothing, check armholes, underarms, crotch joins, pocket corners, zipper ends and cuff or hem joins that stretch during dressing. On bags, inspect strap anchors, handles, zipper ends, buckle tabs and the base where weight transfers into the body. On footwear, focus first on panel attachment, sole edge, tongue and lace supports rather than a decorative line that carries no load.
A photograph cannot load-test these areas or promise long-term strength. It can show a missing stitch run, obvious detachment, large open gap, severe misalignment or a component attached differently from the ordered reference. If the only available view hides a critical anchor under packing material, label the evidence incomplete instead of passing or failing it from assumption.
Compare symmetry with matched reference points
When two sides should match, compare equivalent landmarks: pocket corners relative to the center line, sleeve seams relative to cuffs, shoe panels relative to eyelets, or bag handles relative to the top edge. Perspective can make the side closer to the camera look longer. A fair comparison needs a reasonably centered view or two separate views taken from similar distance and angle.
Not every item is designed to be perfectly mirrored. Curved construction, hand finishing, fabric stretch and intentional asymmetric design can produce differences. First confirm what the listing shows and what the selected option describes. Record a measurable or clearly located difference, not a general feeling that one side “looks off.”
Review edges, hems and binding as a system
Inspect raw-edge coverage, folded hems, neckline or armhole binding, piping and coated edges. Ask whether the edge is consistently captured, whether a section appears exposed, and whether the finish changes the shape. For a printed or coated edge, distinguish a sharp local chip from a highlight caused by protective film or reflected light.
A single thread tail can often be cosmetic, but do not advise cutting it from a photograph. You cannot see whether it is a harmless surplus end or connected to an unfinished stitch. If it sits at a critical join and the surrounding seam is unclear, request a focused view or confirmation through the option currently available on the order. The action should answer the uncertainty, not merely produce more pictures.
Check print, embroidery and patch finishing separately
For prints, inspect placement, visible lifting, cracking or incomplete borders while remembering that glare can resemble a surface break. For embroidery, look for missing filled areas, strong puckering, loose loops and whether the design is visibly aligned to the intended panel. For patches, check the entire attachment border and the relationship to nearby seams.
Warehouse photographs cannot prove color accuracy across screens, fiber content, wash resistance, adhesive lifespan or authenticity. Compare the physical arrival only with the saved listing and exact option. If customization was ordered, spelling, number, placement and selected text belong in the identity check before finish quality is discussed.
Use a decision threshold, not perfection language
Classify each finding by consequence. Pass when the correct item is present and the visible concern does not cross your stated functional or appearance threshold. Ask a focused question when one location, angle or close view can settle the issue. Treat it as a material mismatch when the evidence shows the wrong construction, missing component, open critical seam or finish difference that contradicts the selected option and changes your willingness to ship.
Avoid words such as flawless, perfect, guaranteed or defective unless the evidence supports a precise claim. A useful note says where the issue appears, which photograph shows it, what the saved listing indicates and what result would resolve the decision. This language gives support or warehouse staff something observable to verify.
Request one decision-changing view
Frame a request around location and result: “Please show the full right pocket corner straight on so the seam between the pocket and body is visible,” or “Please confirm whether the gap at the left strap anchor is open or only a folded edge.” Include the order reference and comparison image when the interface permits, with private address or payment information removed.
LoloBuy's public page confirms warehouse photographs but does not establish a universal free-photo count, permanent extra-photo price, video allowance or measurement service. Check the current order interface and displayed terms. If the available evidence would not change your decision, another close-up may add delay without adding useful certainty.
- Name one exact location
- State the visible uncertainty
- Ask for one observable result
- Explain how the result changes the decision
Preserve a compact evidence pack before acting
Keep the source page or dated screenshot, exact selected option, order reference, relevant full warehouse image, annotated crop, issue sentence and requested outcome together. Retain the original image as well as any annotation so the crop does not remove context. Do not include account credentials, full address, payment data or unrelated tracking information in a shared record.
Then use the action and terms shown for that specific order. This guide does not promise a return, exchange, refund, fee or deadline. LoloBuy currently advertises 90 days of free storage, but warehouse storage is not the same as a seller remedy window. Resolve a material concern promptly before the item is consolidated into an international parcel.
Run the final stitching-and-finish pass
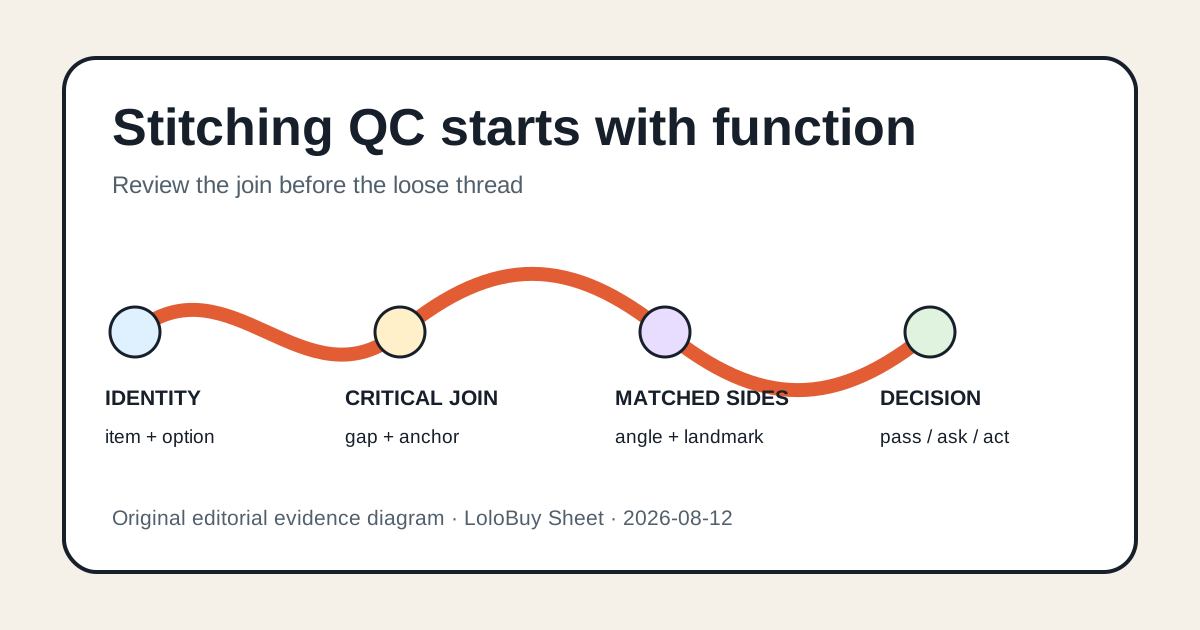
Finish with a short sequence: identity, critical joins, paired symmetry, edges, applied decoration and evidence decision. Record pass, focused question or material mismatch beside each priority area. If all decision-changing visible evidence is acceptable, preserve the record and move the item into parcel planning without pretending the photographs guarantee future wear.
The checklist is deliberately narrower than a general QC guide. It does not repeat sizing, shipping or every category-specific test. Its job is to turn a visually noisy subject—threads, seams, borders and surface cleanup—into a review ordered by function and supported by traceable evidence.
Continue your research
Open a matched product, then verify the live details
Product availability, options, prices and seller notes can change. Use the catalog to find an item, then make the purchase decision from the current page and your saved order record.